
Last updated October 31, 2026
 Home additions & ADU
 Kitchen remodeling
 Bathroom remodeling
 Roofing
 Windows & doors
 Driveway & pavers
 Fence
Free written scope consultation - allowances, timeline, and change-order rules on paper before a single trade is scheduled
Construction Emergency Preparedness Guide for Ontario Homes
During a Santa Ana event, embers can travel over a mile and ignite in roof valleys, attic vents, and deck gaps. These are construction details most Ontario homeowners have never inspected, and standard fire insurance doesn’t require you to address them until after a loss. This guide connects emergency preparedness directly to the physical systems of your home: how your roof performs under ember attack, what happens to your cripple walls during a seismic event, why your grading fails during flash floods, and what a general contractor looks for when assessing damage after the emergency passes. For DIY vs Professional Construction: The Ontario Homeowner’s Decision Guide on these projects, see our comparison. If you own a home in Ontario, the preparedness conversations worth having are not about go-bags. They’re about construction.
Quick Answer
Construction emergency preparedness for Ontario homes means hardening the structure itself against the three dominant local threats: wildfire ember intrusion, seismic movement from nearby fault systems, and flash flooding in foothill-adjacent neighborhoods. The highest-impact steps are installing ember-resistant vents, verifying Class A roofing, bracing cripple walls, strapping water heaters, and correcting grading and drainage around the foundation. Most of these improvements cost less than the insurance deductible you would pay after a preventable loss.
Styles & brands we work with
Table of Contents
- Wildfire Construction Hardening for Ontario Homes
- Seismic Preparedness at the Construction Level
- Flash Flood and Drainage Vulnerabilities in Ontario Foothill Neighborhoods
- Emergency Shutoff Literacy: Gas, Water, and Electrical Access
- Post-Emergency Construction Triage: What a GC Checks First
- How Remodels and Additions Change Your Emergency Profile
- A Seasonal Inspection Checklist for Ontario Homeowners
- Common Mistakes to Avoid
- When to Call a Professional
- Frequently Asked Questions
Wildfire Construction Hardening for Ontario Homes
Ontario sits in a fire-prone corridor where Santa Ana winds push flames and embers through foothill communities with little warning. What most homeowners miss is that the majority of homes lost to wildfire are not consumed by a wall of flame. They ignite from embers that enter through small openings and smolder for hours before anyone notices. The construction details matter more than the fireline distance.
Start with the roof. Class A roofing is the standard in Ontario’s wildland-urban interface zones, and the most common materials meeting that rating include asphalt composition shingles from manufacturers like GAF, CertainTeed, and Owens Corning, as well as standing seam metal and certain tile systems. But the roof assembly is more than the shingle. Roof valleys, where two planes meet, collect debris and embers. Gaps at the eave line, where the roof deck meets the fascia, can admit embers directly into the attic. In our experience walking Ontario homes after Santa Ana events, we regularly find ignition points at the eave and valley transitions, not in the middle of the roof field. This aligns with what Workshop Contractors sees across the General Contractor in Woodcrest service area, where similar wildland-urban interface conditions exist.
Vents are the second critical opening. Most Ontario homes built before 2015 have standard mesh attic vents with openings large enough for embers to pass through. Ember-resistant vents use a finer mesh or an intumescent coating that expands under heat to seal the opening. California Building Code now requires ember-resistant vents in new construction in high fire hazard severity zones, but most existing homes predate the requirement. See Construction Permits, Codes & Inspections in CA: What You Need to Know for when upgrades trigger code review.
Defensible space connects directly to the structure. The first five feet from the house, known as Zone Zero, is the most important. Here’s what matters at the construction level:
- Decks: If your deck is within 10 feet of a slope or elevated terrain, the underside becomes an ember trap. Enclosing the deck perimeter with metal screening and removing stored materials underneath eliminates the most common deck ignition path.
- Siding: Stucco, fiber cement like James Hardie siding, and brick provide real resistance. Vinyl siding melts and exposes the wall assembly. The transition points matter more than the field: where siding meets the foundation, where it terminates at roof intersections, and around window and door openings.
- Gutters: Metal gutters with leaf guards reduce the fuel load. Plastic gutters melt and drop burning material at the foundation line.
- Fencing: A wood fence attached directly to the house creates a continuous fuel path. The attachment point should be a metal post or a masonry connection, not wood-to-wood contact at the structure.
The goal is to make your home’s exterior surfaces and openings non-receptive to embers. That’s a construction standard, not a landscaping preference. For related guidance, see our Construction Warning Signs: A Ontario Homeowner’s Reference Guide.
Seismic Preparedness at the Construction Level
Ontario sits within shaking range of the San Andreas, San Jacinto, and several lesser-known but locally significant fault systems. The Inland Empire has produced damaging earthquakes historically, and the predominant residential construction type here, raised foundation with a crawl space, has a specific and well-documented vulnerability: the cripple wall.
Cripple walls are the short stud walls between the foundation and the first floor framing, typically 18 inches to 3 feet tall, enclosing the crawl space. They carry the entire weight of the house and resist lateral loads poorly when unbraced. When shaking begins, an unbraced cripple wall can rack and collapse, dropping the floor system onto the foundation, severing gas lines, and causing structural damage that far exceeds what the shaking alone would produce.
Here is the step-by-step assessment a contractor follows when evaluating a home in Ontario:
- Access the crawl space and identify whether the home has cripple walls. Slab-on-grade homes do not, but most Ontario homes built before 1980 sit on raised foundations with cripple walls present.
- Check for plywood or OSB sheathing on the inside face of the cripple wall. If you see open stud bays with no sheathing, the wall is unbraced.
- Check for anchor bolts connecting the mudsill to the concrete foundation. Older homes often have no bolts or bolts at spacing far wider than the 4-foot maximum the current code requires.
- Check the connections between the cripple wall top plate and the floor joists above. These are often toenailed only, with no metal connectors.
- Verify that the water heater is strapped with two straps, one in the upper third and one in the lower third, secured to wall studs with lag bolts. In Ontario, unstrapped water heaters are a leading source of post-earthquake fire and water damage.
Soft-story conditions matter for larger homes. If a living space was added above a garage, the garage walls may be mostly open with a single door opening, making them susceptible to lateral racking. Ontario has many homes with garage conversions or bonus rooms above garages, and few homeowners realize that the original garage framing was never designed for the additional seismic load. A licensed general contractor can evaluate the load path and recommend shear wall additions or steel moment frames where needed.
The good news is that seismic retrofitting of a typical Ontario home, cripple wall bracing plus anchor bolts plus water heater strapping, is one of the most cost-effective construction improvements available relative to the damage it prevents. It’s the kind of work Workshop handles as part of Home Renovation in Woodcrest projects, where structural upgrades are often integrated into broader remodel scopes.
Flash Flood and Drainage Vulnerabilities in Ontario Foothill Neighborhoods
Ontario’s geography creates a specific flood profile. Homes in the southern and central portions of the city sit on relatively flat alluvial terrain where the primary risk is sheet flow during short-duration, high-intensity rain events. Homes in the northern foothills, including neighborhoods near the San Gabriel Mountain front, face concentrated runoff from burned or denuded slopes above them. After wildfire removes ground cover, the runoff coefficient increases dramatically, meaning the same rain event produces significantly more water moving at higher velocity.
The construction-level vulnerabilities to evaluate:
Grading and site drainage. The ground should slope away from the foundation at a minimum of 5% (6 inches of fall in the first 10 feet). On flat Ontario lots, this frequently fails. Over time, soil settles, irrigation erodes, and the grade can reverse, directing water toward the foundation. During a flash flood event, that reversed grade channels water directly into the crawl space or under a slab.
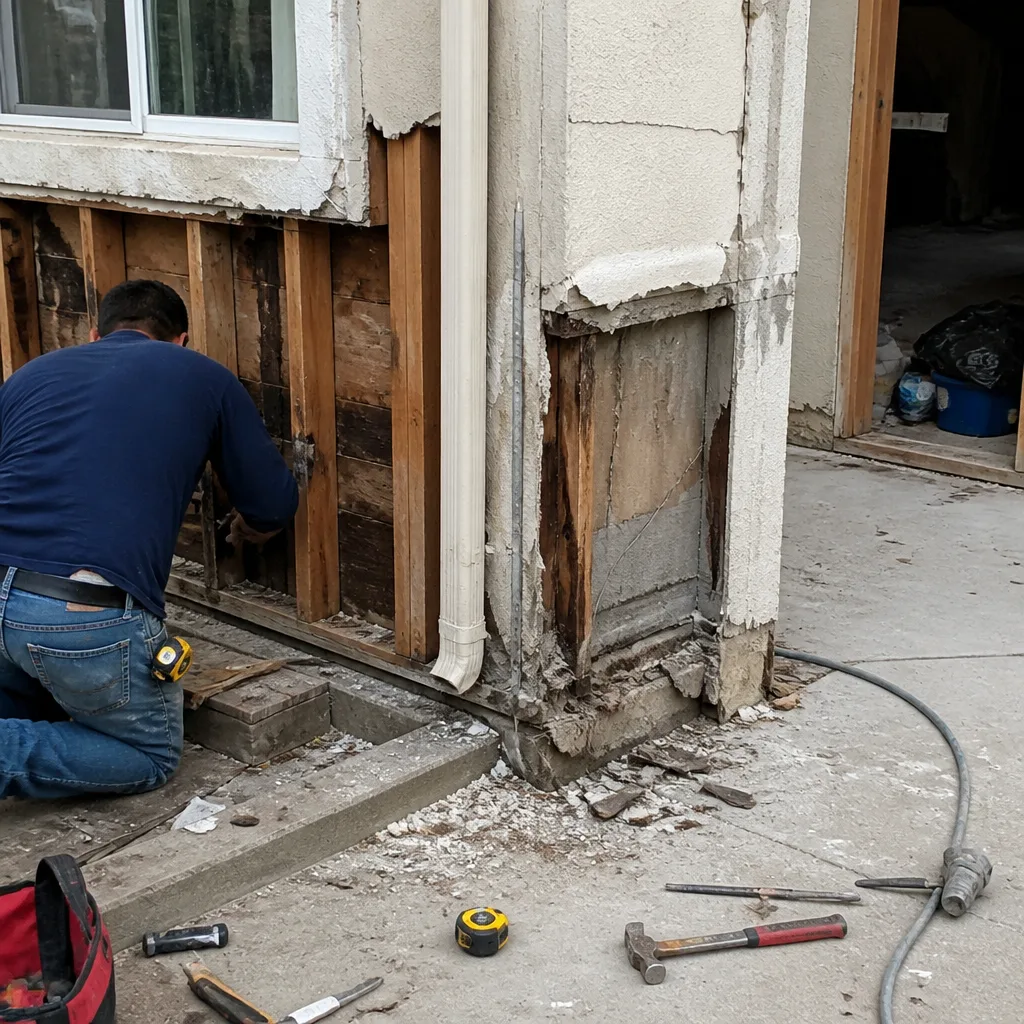
Stucco grade clearance. Stucco that extends to or below the soil line wicks moisture upward through capillary action. What starts as a drainage problem becomes a structural and mold problem behind the stucco. The proper clearance is 4 inches minimum between the bottom edge of stucco and grade, and 6 inches is better in areas with irrigation.
French drains and swales. A French drain is a perforated pipe in a gravel-filled trench that intercepts subsurface water and carries it away from the foundation. Properly installed systems include a filter fabric envelope, a positive slope of at least 1% toward the outlet, and a discharge point that is legal and functional. Many Ontario homes have French drains that were installed without cleanouts or that discharge onto a neighbor’s property, which is both a code violation and a liability.
Downspout destinations. Downspouts that discharge at the foundation line are a code violation in most Ontario jurisdictions. Extensions should carry water at least 5 feet from the foundation, and in flood-prone areas, connections to buried drainage piping routed to the street or a retention area are preferred.
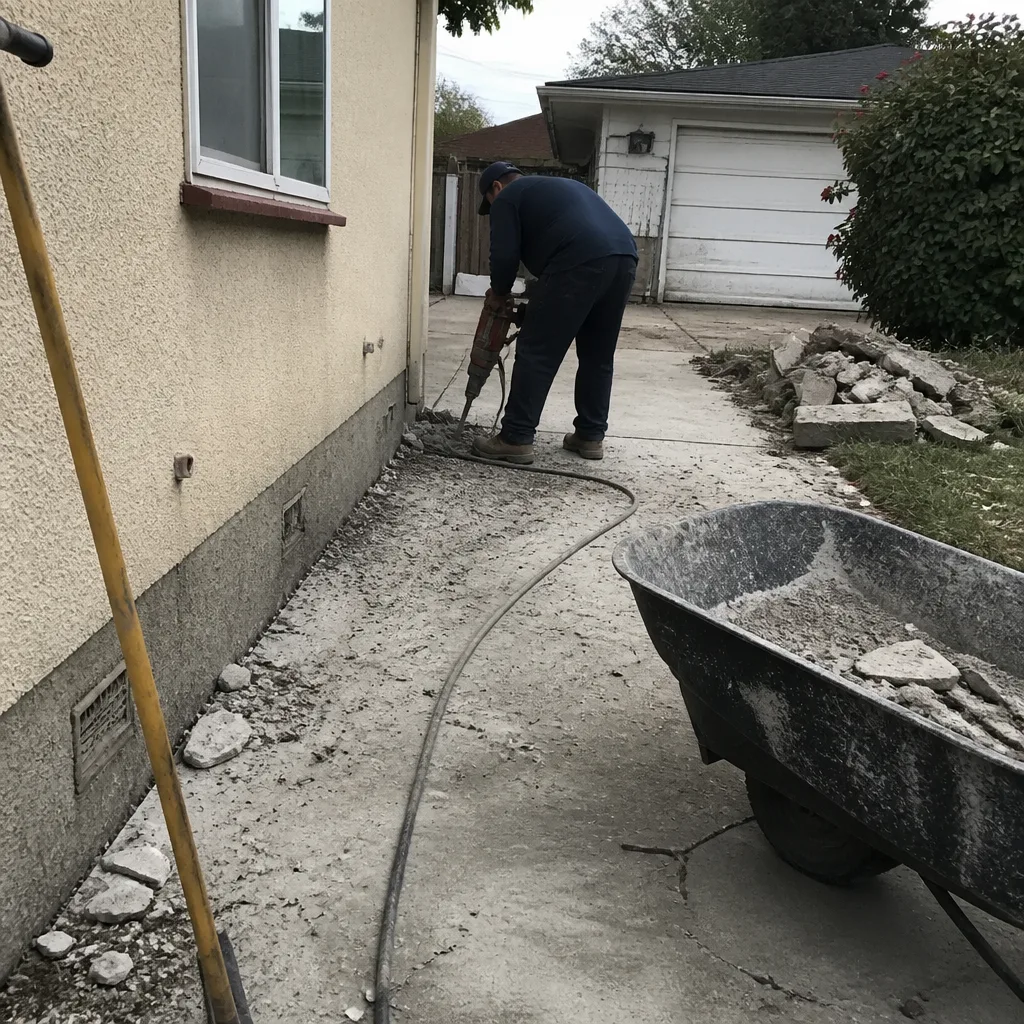
The interaction between hardscape and drainage is often ignored. Pavers from manufacturers like Belgard and Unilock can be installed on permeable bases that allow water to infiltrate, or on impermeable bases that create runoff where none existed before. The base design matters more than the paver choice. When hardscape increases the impervious surface area of the lot, the drainage plan must be upgraded to match, otherwise the house becomes the low point in a system that previously worked.
Emergency Shutoff Literacy: Gas, Water, and Electrical Access
Every homeowner should be able to shut off gas, water, and electrical service within 30 seconds. But Ontario homes frequently present access problems, and remodels sometimes make them worse.
Gas shutoff. The gas meter is typically located on an exterior wall or at the property line. The shutoff valve is on the inlet pipe at the meter, and it requires a quarter-turn with a wrench to move from the vertical (open) position to the horizontal (closed) position. Keep a crescent wrench or a purpose-made gas shutoff tool at the meter or in a designated location near the front door. Automatic seismic gas shutoff valves are available and can be installed upstream of the meter, but they activate only on significant shaking, not on gas smells.
Remodels complicate gas access. If a kitchen or laundry relocation moves gas appliances, the new gas lines should have accessible shutoffs at each appliance location, not just at the meter. Some older Ontario homes have gas lines routed through crawl spaces or attic spaces where shutoff access is poor. A qualified plumber or general contractor can evaluate whether your system’s shutoffs meet current code.
Water shutoff. The main water shutoff valve is typically located at the front property line where the service line meets the municipal connection, and a secondary shutoff is often at the house. Many Ontario homes built before 1990 have gate valves that have seized open over time. Replacing a seized gate valve with a quarter-turn ball valve is a simple, inexpensive improvement that makes emergency water shutoff reliable. In our experience, the water shutoff is the most frequently failed component during a non-disaster emergency, usually a burst pipe or supply line leak, because homeowners cannot close a valve that has not been operated in years.
Electrical shutoff. The main breaker in the electrical panel disconnects all power. But remodels sometimes relocate panels or add subpanels, and homeowners need to know which panel controls what. If a remodel added an ADU or a major addition, there may be a subpanel on the new structure, and the main shutoff may be at the service entrance. The key is knowing the sequence: for a flood event, shut off power before water contacts any electrical component. For a fire event, shut off power only if you can reach the panel safely; otherwise, leave it and evacuate.
Label the panel face. Every breaker should be identified, and the main breaker should be clearly marked. After any remodel, verify that the labeling reflects the current configuration, not the pre-remodel layout.
Post-Emergency Construction Triage: What a GC Checks First
After a seismic event, a wind event, or a flood, the sequence of assessment matters. A general contractor’s triage process is different from a homeowner’s visual scan, and understanding the sequence helps homeowners make better decisions about what needs attention and what can wait.
Here is the general sequence a contractor follows after an emergency in Ontario:
- Life safety and structural collapse risk. Before entering a structure, check for visible shifting: foundation cracks wider than a quarter inch, racked walls, sagging roof lines, or a chimney that has separated from the house. If any of these are present, do not enter. Get a structural evaluation.
- Gas and electrical hazard assessment. If you smell gas or see sparking, shut off the respective systems and evacuate. Do not re-enter until a qualified professional has cleared the system.
- Foundation and vertical load path. A contractor checks whether the structure is still plum and level. Post-earthquake checks include looking for new cracks at the corners of door and window openings, gaps at wall-to-ceiling intersections, and any sign that the floor system has moved relative to the foundation.
- Lateral system damage. This includes cripple wall racking, shear wall nail pullout, and any separation of the framing from the foundation. This damage is often hidden in the crawl space and missed by homeowners.
- Roof and exterior envelope. After wind events, check for lost shingles, lifted flashing, and any penetration through the roof deck. After flood events, check the stucco moisture content and the condition of the drainage system.
- Interior finishes and cosmetic damage. This is the last thing to assess. Drywall cracks, tile cracks, and trim separation are frequently cosmetic and can be addressed after the structural picture is clear.
The sequence matters because homeowners often start at step 6. They see a drywall crack and panic, when the actual problem may be a minor cosmetic issue, or they miss a crawl space racking failure because they never looked under the house. A homeowner who understands the sequence can make better decisions about when to engage a professional and what level of urgency to place on each finding.
How Remodels and Additions Change Your Emergency Profile
Every renovation changes the emergency performance of your home, sometimes for better and sometimes in ways the homeowner never considered. Understanding these changes is part of responsible project planning.
Roofing replacements. A roof replacement with a Class A material from GAF, Owens Corning, or CertainTeed improves fire resistance. But if the reroof does not address eave details, valley transitions, and vent replacements, the ember vulnerability remains. A quality reroof includes upgrading vents to ember-resistant designs and detailing the eave line properly. This is the difference between a roofing crew that nails shingles and a general contractor who manages the entire envelope.
Window and door replacements. Dual-pane insulated glass from manufacturers like PGT and CGI improves energy performance and wind resistance. But the installation details matter for fire performance. Gaps around window and door frames create ember entry points. Proper flashing and sealing at installation reduce both air leakage and ember intrusion. During a remodel, these details are worth getting right, because retrofitting them later is more expensive.
Kitchen and bath remodels. When you move plumbing fixtures and gas lines, you change the shutoff access profile of the home. A kitchen remodel should include accessible shutoffs at each fixture and a gas shutoff location that is easy to reach in an emergency. If you’re choosing fixtures, brands like Kohler, Grohe, and Moen offer quarter-turn shutoff valves that are more reliable than older compression valves. If you’re selecting plumbing systems for a bath remodel, Toto, Sterling, and Grohe fixtures integrate with modern shutoff systems that make emergency isolation simpler. If you’re considering a bathroom renovation with waterproofing details, a Schluter system properly installed prevents the moisture intrusion that becomes a cascading problem after a flood event.
ADU additions. Adding an accessory dwelling unit changes the emergency profile of the property in two ways. First, the new structure has its own shutoff systems, and the homeowner needs to know where they are. Second, the addition creates a new electrical load and a new gas line, which may require a panel upgrade or a gas meter upgrade. If the ADU is a prefab unit from a manufacturer like Abodu, Dvele, or Boxabl, the systems integration still requires proper site work, including drainage, utility connections, and fire separation. We’ve found that homeowners sometimes treat a prefab ADU as a self-contained unit and overlook the site-level emergency infrastructure that still needs professional coordination.
Hardscape and drainage changes. Any hardscape project changes the drainage profile of the lot. Paver patios from Belgard, Unilock, or Techo-Bloc installed on impermeable bases increase runoff. The drainage plan must be updated to handle the new flow paths, or you’ve created a flood risk that didn’t exist before. The same applies to fencing projects: replacing a chain-link fence with a solid wood or vinyl fence changes wind loads and fire fuel continuity, and the attachment details at the house matter more than the field fencing.
From a homeowner’s perspective, the point is that every construction decision has an emergency preparedness dimension. A general contractor who manages the full scope is thinking about these interactions. A single-trade contractor is thinking about one system. That distinction matters most in the middle of an emergency, when the systems are all interacting at once. As a Home Remodeling in Woodcrest contractor, we approach every renovation with the full system picture in mind.
This is also where the Workshop brand portfolio matters practically. If we’re replacing a roof, we can coordinate the gutter, fascia, and vent details in one scope. If we’re remodeling a kitchen, the plumbing fixtures and the electrical panel changes happen under the same schedule. That’s not a marketing point. It’s the operational reality that reduces coordination errors during the construction phase, and those errors are precisely the ones that become emergency vulnerabilities later.
A Seasonal Inspection Checklist for Ontario Homeowners
Here’s a practical, seasonally-aligned checklist that covers the highest-value inspection points for Ontario homes. This is written for a homeowner who wants to do a walk-around and under-house inspection without specialized tools.
Fall (pre-Santa Ana season):
- Walk the roof line visually from the ground. Look for lifted shingles, damaged flashing at valleys and penetrations, and any debris accumulation in valleys.
- Check all attic vents and eave vents from a ladder or from the ground with binoculars. Look for mesh openings larger than 1/8 inch. This is the ember admission standard.
- Clean gutters and downspouts. Verify downspout extensions are in place and discharging at least 5 feet from the foundation.
- Inspect the first 5 feet from the house (Zone Zero). Remove anything stored under decks, against the siding, or in contact with the structure.
- Test the gas shutoff valve at the meter with a wrench. If it doesn’t move freely, call a plumber to replace it before you need it.
Winter (pre-flood season):
- Check the grading around the foundation. Look for areas where the soil has settled and water could pool against the foundation.
- Inspect the stucco grade clearance. Verify at least 4 inches of clearance between the bottom edge of the stucco and the soil.
- Test the main water shutoff valve. Close it and open it. If it’s stuck, replace it now.
- Check crawl space for standing water, moisture staining, or mold on the underside of the floor system.
- Verify that the French drains and surface drains are not clogged with leaves or sediment. Run a hose through them and watch the outlet.
Spring (post-rain assessment):
- Re-enter the crawl space and look for any new moisture, any movement at the cripple wall connections, and any anchor bolt separation from the foundation.
- Check for new cracks in interior walls and ceilings, especially around door and window openings. Measure and photograph them for comparison over time.
- Verify water heater strapping is intact and secure.
- Inspect the roof for any storm damage: missing shingles, lifted flashing, or punctures from windblown debris.
- Test GFCI outlets in wet locations and verify that the main breaker panel labeling is accurate.
Summer (routine maintenance):
- Check the roof valley and eave details again before the fire season peaks.
- Inspect weatherstripping and seals at all exterior doors and windows.
- Verify that the fence-to-house connection is intact and not creating a fuel path.
- Review the emergency shutoff locations with everyone in the household.
- Photograph the entire property, inside and out, for insurance documentation.
This checklist takes about two hours per season for most Ontario homes. The value is not in the time spent. It’s in the problems caught before an emergency turns them into failures.
Common Mistakes to Avoid
- Focusing on go-bags instead of the structure. Emergency supplies matter, but the home’s construction systems determine whether you have a structure to return to after the event. Ontario homeowners who spend more time on supply kits than on ember-resistant vents have their priorities backwards.
- Assuming insurance will handle it. Insurance pays claims after a loss. It doesn’t restore the family photos or the sense of security. Many Ontario homeowners discover after a fire that their policy’s replacement cost coverage doesn’t match current construction costs, leaving them with a gap they didn’t plan for.
- Ignoring the crawl space. The most important seismic vulnerability in most Ontario homes is hidden under the floor. If you’ve never looked at your cripple walls, you don’t know your home’s seismic condition.
- Installing French drains without an outlet plan. A French drain that doesn’t legally discharge to the street or a retention area is a liability, not a solution. Improperly terminated drainage can cause more damage than no drainage at all.
- Failing to re-assess after a remodel. Every remodel changes shutoff access, electrical loading, gas line routing, and drainage patterns. If you haven’t re-walked the shutoff locations after your kitchen remodel, you don’t know your own home.
- Sealing an old meter shutoff with paint. This happens more often than you’d think in Ontario, where homes get repainted and the meter valve gets painted over until it’s frozen. A shutoff you can’t operate is worse than no shutoff, because it gives you a false sense of security.
- Neglecting the roof valley and eave details during reroofing. A new roof with old ember vulnerabilities is a missed opportunity. The roof is your single biggest fire exposure, and the details at the transitions matter more than the shingle manufacturer.
When to Call a Professional
Some emergency preparedness improvements are homeowner projects. Others require a licensed contractor. Here are the situations where professional help is the right call:
- Seismic retrofitting, including cripple wall bracing, anchor bolt installation, and shear wall additions. This work requires engineering and permit oversight.
- Roof replacement or repair that includes valley detailing, eave closure, and ember-resistant vent installation. Roof work at height is a leading cause of homeowner injury.
- Drainage system design and installation, including French drains, swales, and downspout integration. Improper drainage can damage your foundation and create liability with neighbors.
- Gas line work, including shutoff valve replacement, appliance relocation, and seismic valve installation. Gas work requires specialized licensing and permits.
- Post-event structural assessment after any significant seismic or flood event. A qualified contractor can tell you which cracks are cosmetic and which indicate structural movement.
Workshop Contractors offers free estimates in Ontario for these scopes. Call (844) 384-3361 to schedule an assessment of your home’s emergency preparedness, whether that’s a roof inspection, a crawl space evaluation, or a complete drainage review. As a Workshop Contractors home client, you get one contractor responsible for every system, which matters most when those systems are under stress.
Frequently Asked Questions
Seismic retrofits for typical Ontario homes with raised foundations, including cripple wall bracing, anchor bolts, and water heater strapping, typically cost between $8,000 and $25,000 depending on the size of the home and the complexity of the existing conditions. This is a wide range because some homes need only the minimum brace-and-bolt package while others need full shear wall additions and foundation repairs. The cost is significantly less than the premium increase or the out-of-pocket damage after an earthquake. Call (844) 384-3361 for an exact quote, and our estimate is free.
Ontario follows California Building Code requirements that mandate ember-resistant vents on new construction in high fire hazard severity zones. Existing homes are not retroactively required to upgrade unless they undergo significant renovation work that triggers a code review. However, ember-resistant vents are one of the lowest-cost, highest-impact fire hardening improvements available, and most Ontario homeowners in the foothill zones would benefit from upgrading regardless of the code trigger.
The most common construction vulnerability during Ontario flood events is reversed grading around the foundation. Years of soil settlement and landscape changes result in ground that slopes toward the house, channeling sheet flow directly into the crawl space or under a slab. Combined with downspouts that discharge at the foundation line, this is the leading cause of flood-related water intrusion in Ontario homes. Call (844) 384-3361 for a free drainage evaluation.
Yes, and this happens frequently in Ontario. An addition changes the electrical load, gas line routing, drainage patterns, and seismic load path of the entire structure. If these systems are not integrated properly, the addition creates vulnerabilities that didn’t exist before. A general contractor who manages the full scope is responsible for these interactions. A single-trade contractor is not.
Basic ember hardening, including vent replacements, gutter cleaning and guards, Zone Zero clearance, and eave gap sealing, can be completed in one to two weeks of work spread across a single visit or two visits. Roof replacement with full ember detailing takes longer, typically three to seven days depending on the scope, and is best completed before the Santa Ana season begins. There is no single project that makes a home fireproof, but the combination of vent upgrades, eave detailing, and Zone Zero discipline makes a measurable difference in survival probability.
After an earthquake, check for gas leaks first, then structural collapse indicators, then water system damage, in that order. Gas leaks and structural instability are the two life-safety concerns that require immediate action. If you smell gas, shut off the gas at the meter and evacuate. If you see cracked walls, a sagging roof line, or a chimney that has separated from the house, do not enter until a professional has evaluated the structure. Call (844) 384-3361 for a post-event structural assessment.
The Bottom Line
Construction emergency preparedness for Ontario homes is not about buying supplies. It’s about hardening the structure against the three dominant threats: ember intrusion during Santa Ana events, cripple wall failure during seismic shaking, and drainage failure during flash floods. The highest-impact improvements are ember-resistant vents, Class A roofing with proper eave and valley detailing, cripple wall bracing with anchor bolts, water heater strapping, and grading corrections that move water away from the foundation. Each of these is a construction project, not a shopping list item. The homeowners who fare best after an emergency are the ones who understood their home’s systems before the event. That understanding starts with an inspection and ends with a call to a contractor who can handle the full scope. Explore more guides & resources on protecting your Ontario home.
Written by the team at Workshop Contractors, serving Ontario since 2011.
See the difference
 Before
 After
 Before
 After
 Before
 After